
How To Create A 4 Note Chord With Ableton's Operator

FM synthesis can seem a very mysterious beast and via a series of tutorials we are going to help demystify this for you, so you can take full control over your FM synths and make all the sounds you desire.
In this how-to tutorial, we are going to look at creating a four-note chord only using operator from Ableton. The huge advantage of using this technique over programming your chord in a midi clip or via a chord midi effect is that you get full control over each note. Meaning you can have say, a different waveform, envelope and volume (just to name a few) per note.
So, if you would like to learn more about FM synthesis keep reading.
What is FM synthesis?

Maybe, before we start we can give you a brief overview of FM Synthesis. In FM synthesis you have carrier oscillators and modulator oscillators. The carrier produces the sound and the modulator modulates that sound helping to create a totally different waveform. Even a small increase in the modulators volume can make huge differences.
In this audio example below we have modulated a sine wave with another sine wave an octave above, each note is played C2 on the keyboard. In the audio file 1, you have the pure waveform, in 2 you have the modulated sine wave. As you can already hear you not just hearing 2 sine waves on top of each other your hearing a whole new sound. This modulation makes FM synthesis a go-to for all manner of sounds like drums, bass, keys and plucked instruments. And that is just to name a few. If you would like to hear some of the sounds we have created with Ableton’s Operator why not check out this pack
For more info and history on FM synthesis why not have a read of this Wikipedia page
Chord Fine Tune Picthes
Ok, now we know what FM synthesis is and what is good for we can start looking at building this 4 note chord only using Ableton's Operator. When creating a chord it is advisable to know what is the fixed note value in FM synths fine-tuning so you can better build your chord. Here is a list of the fine-tune values for each chromatic note. This will work for any FM synth.
0 - 0
1 - 59
2 - 122
3 - 189
4 - 260
5 - 335
6 - 414
7 - 498
8 - 587
9 - 682
10 - 782
11 - 888
12 - 1000
Chord Set Up

You can choose your own chord but here we are going to create a minor 7th chord which is great for techno and house.
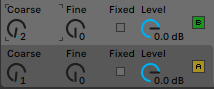
Now that we have the note values let's set up operator, we only want to have carriers that produce sound rather than modulators (that modulate your carriers producing the stereotypical FM sound). You will have to go to the global section and choose the last matrix. This ensures we will hear each note of our chord.

Set the fine tune for each operator/osc to your desired note value, for the minor 7th that we choose it is A (oscillator) = 0 B=189 C=498 D=782.
Using new waveforms and envelope values

With the chord set, we can now adjust different volumes, waveforms and amp envelopes for each note. This can help create an evolving chord sound. It is really nice to have 3 notes play instantly and then one note fade in with a longer attack. Using the 5th or root to fade in is best if you want to create a darker vibe as these two notes are more harmoniously linked and create a “happier” vibe.
Adding some FM

It’s worth noting that you can still get the vibe of FM synthesis by using the feedback in each operator or using the LFO (which in fact is the 9th oscillator in the synth) in high mode.
With the routing matrix set to each operator being a carrier that means that you will have the feedback engaged (if it does have a modulator connected it will not, for example if operator B is modulating operator A, A will not have the feedback engaged). In each oscillator section you can turn up the feedback to taste.
Each waveform will give you different audible results. For example with a simple sine wave and full feedback it is almost sounding like a saw.
Using the LFO for further modulation can help create a raw FM tone to the chord.
Setting the LFO to high mode means you get an oscillation rate of 8Hz to 12kHz, so as soon as you reach a rate of 40% you will be in the threshold of hearing allowing you to create an audible tone to the sound.
Like with any modulator in FM synthesis, try a different waveforms, volume and envelope settings.
Final Touches

With all good oscillators you will more than likely need to tame the sound. So we will finish this preset off by diving into the filter section to help pull back some of those harsh frequencies. Set the filter to low pass 24 and increase the envelope amount to help bring out a bit of pluck in the sound.
Anytime you use an Ableton filter it is more than worth using the filter circuits as these help to add more warmth and edge to your sounds.
Closing
The key takeaway here is there are a lot of different ways to do one thing in music production, like in this example where we have created a chord only using a operator rather than the piano roll or midi effect. This helps us open up new possibilities to the processing and set up of each note in the chord. See if you can find out other ways to create chords.
If you are looking for more Ableton tips and tricks click here.
And if you want the preset download here.
Featured


- 808 drums
- 808 hihats
- ableton
- ableton mixing tips
- Acid
- Acid Techno
- Acid V
- analog techno
- Arturia
- Arturia Acid V
- audio effect
- audio effect rack
- bass
- bass drum
- beat
- blog
- chord
- clap
- course
- custom
- dark techno
- drum
- drum mixing
- drum sound design
- drum synth
- drums
- dub techno
- effect
- EQ
- free
- free loops
- free music
- free music loops
- free sample pack
- freebie
- fx
- grain delay
- hats
- hi hats
- house
- how to
- kick
- kick drum
- learn
- loop
- loops
- maschine
- massive
- massive x
- microhouse
- midi effect
- minimal
- mixing
- mixing bass and kick
- mixing tips
- moog
- native instruments
- operator
- perc
- percussion
- preset
- raw dark techno
- raw techno
- sample pack
- serum
- snare
- sound a like
- sound design
- sounds
- star wars
- synth
- synth series
- synthesis
- tech
- tech house
- Techno
- techno
- techno kick
- techno mixing tips
- techno production
- tips & tricks
- top
- trap
- tutorial
Learn how to design dark techno leads using Thor in the Reason Rack Plugin. This tutorial covers oscillator layering, filter routing, LFO modulation, distortion, and effects to create aggressive techno lead sounds.